Hướng dẫn cài đặt ứng dụng Ae Review Pro trên Sapo
1. Cài đặt ứng dụng
Để cài đặt ứng dụng CRO Buttons vào website trên sapo, bạn thực hiện theo 3 bước sau:
-
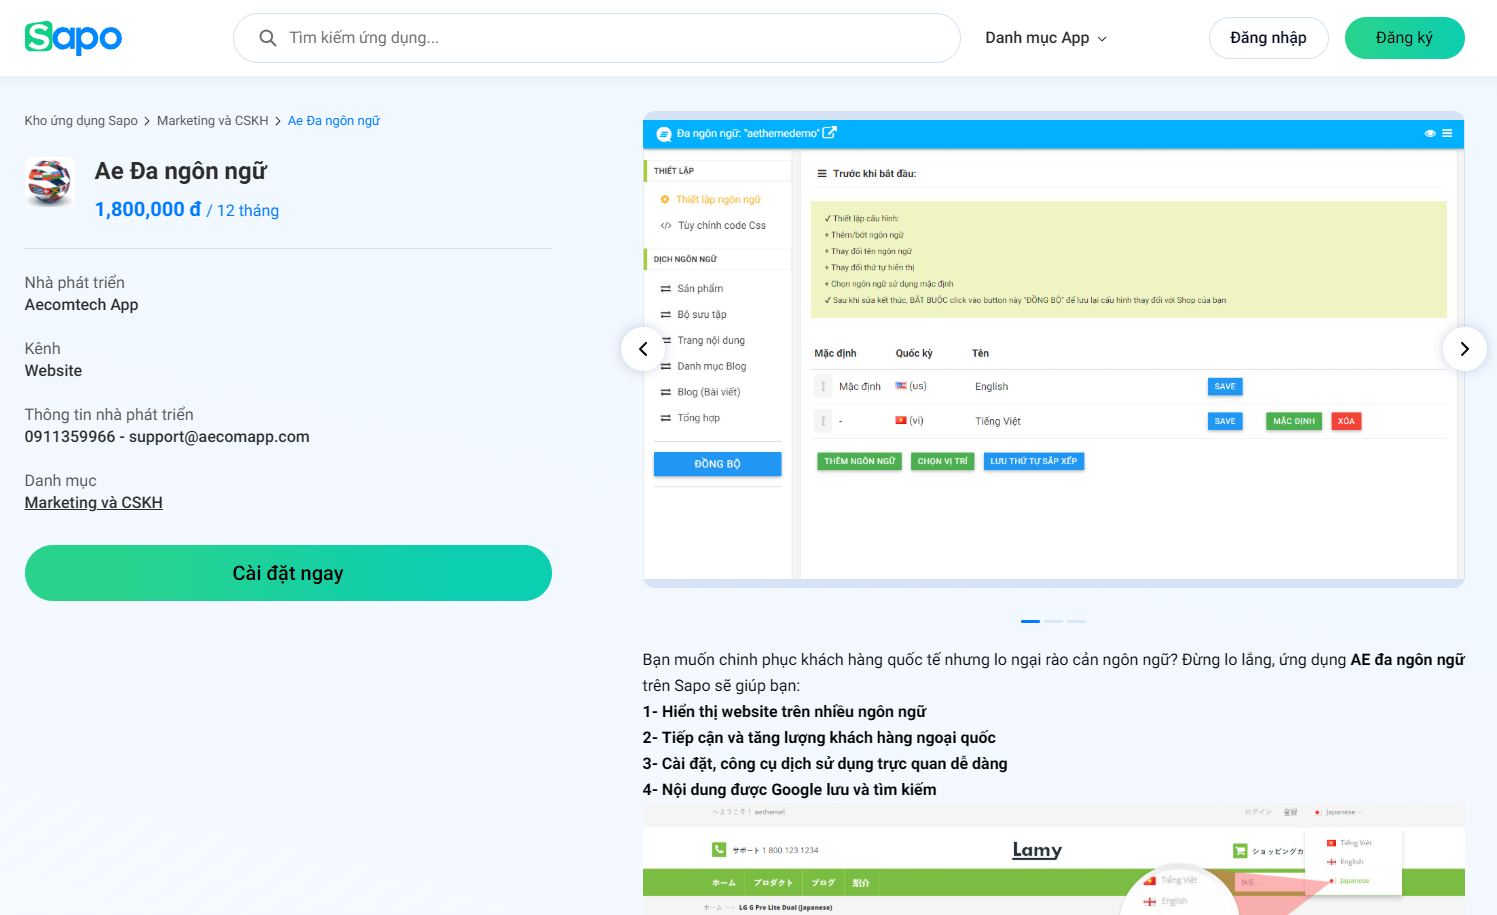
Bước 1: Truy cập vào link ứng dụng Ae Review Pro trên Sapo
-
Bước 2: Click vào nút
Cài đặt
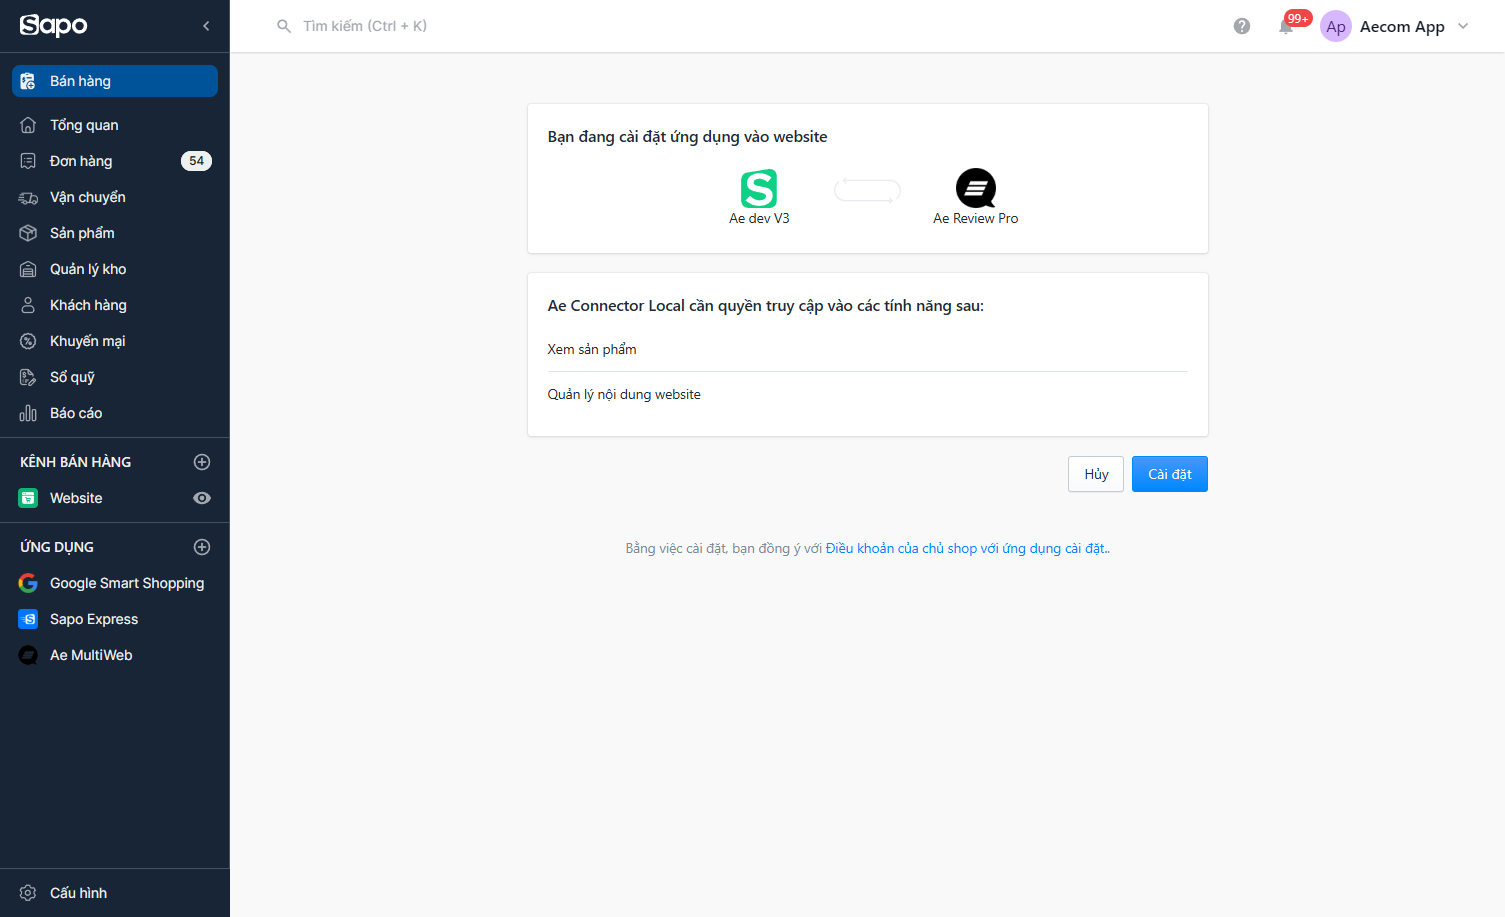
- Bước 3: Điền link cửa hàng bạn muốn cài đặt Ae Review Pro. Bấm
Đăng nhậpđể cài đặt ứng dụng
Bạn cần đăng nhập bằng tài khoản chủ cửa hàng để có quyền cài đặt ứng dụng

...tiếp tục, bấm Cài đặt để xác nhận.
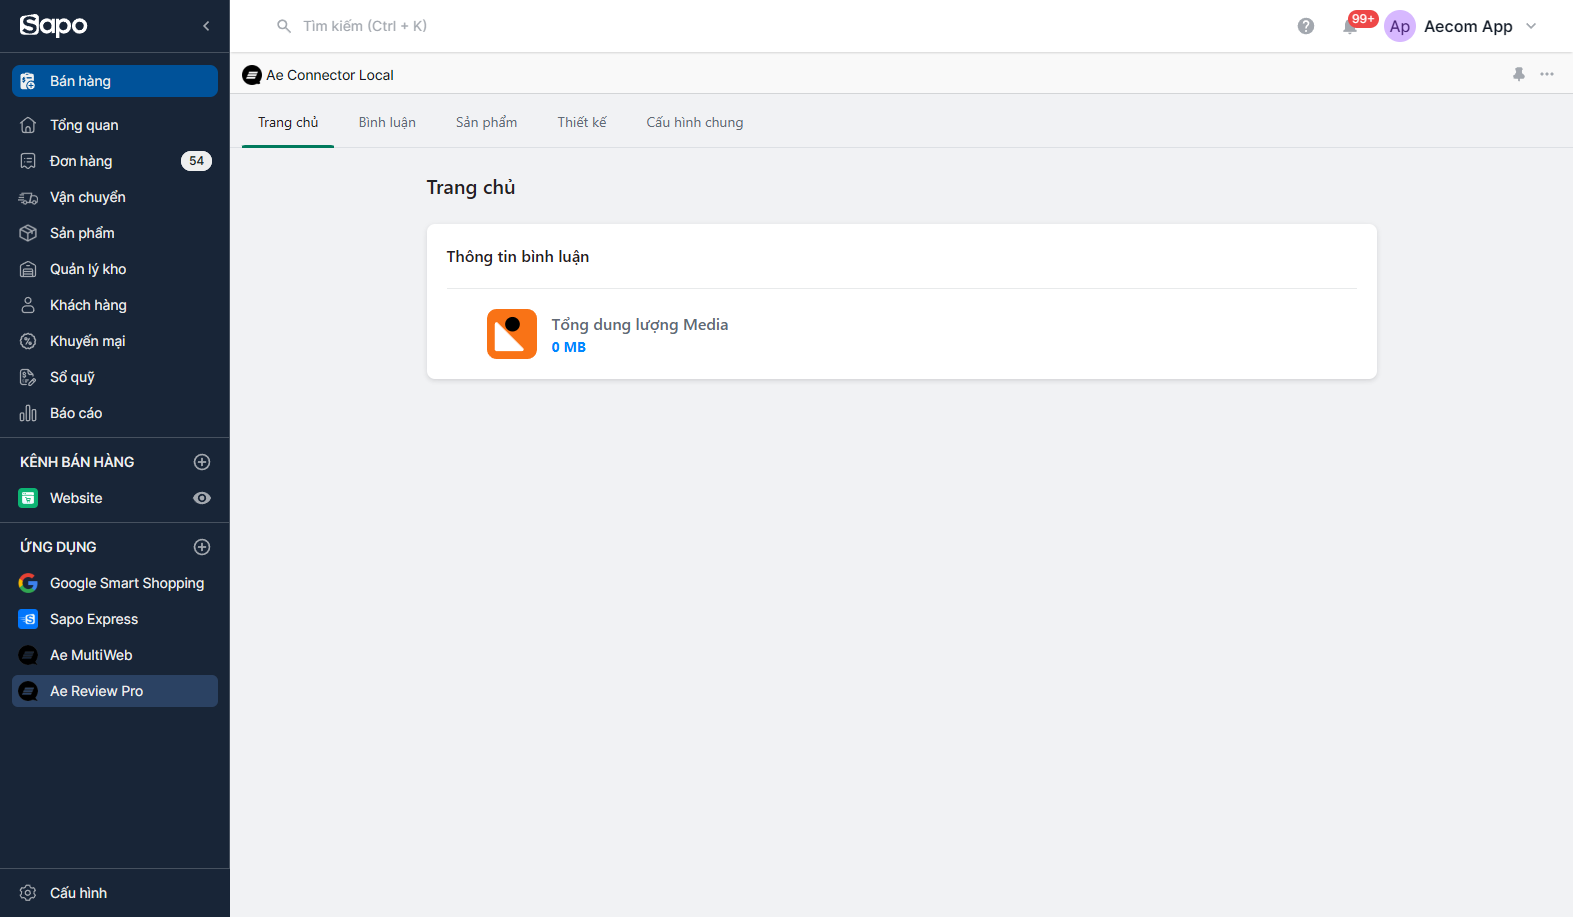
2. App Admin của ứng dụng Ae Review Pro
Giao diện của Ae Review Pro sau khi cài đặt thành công
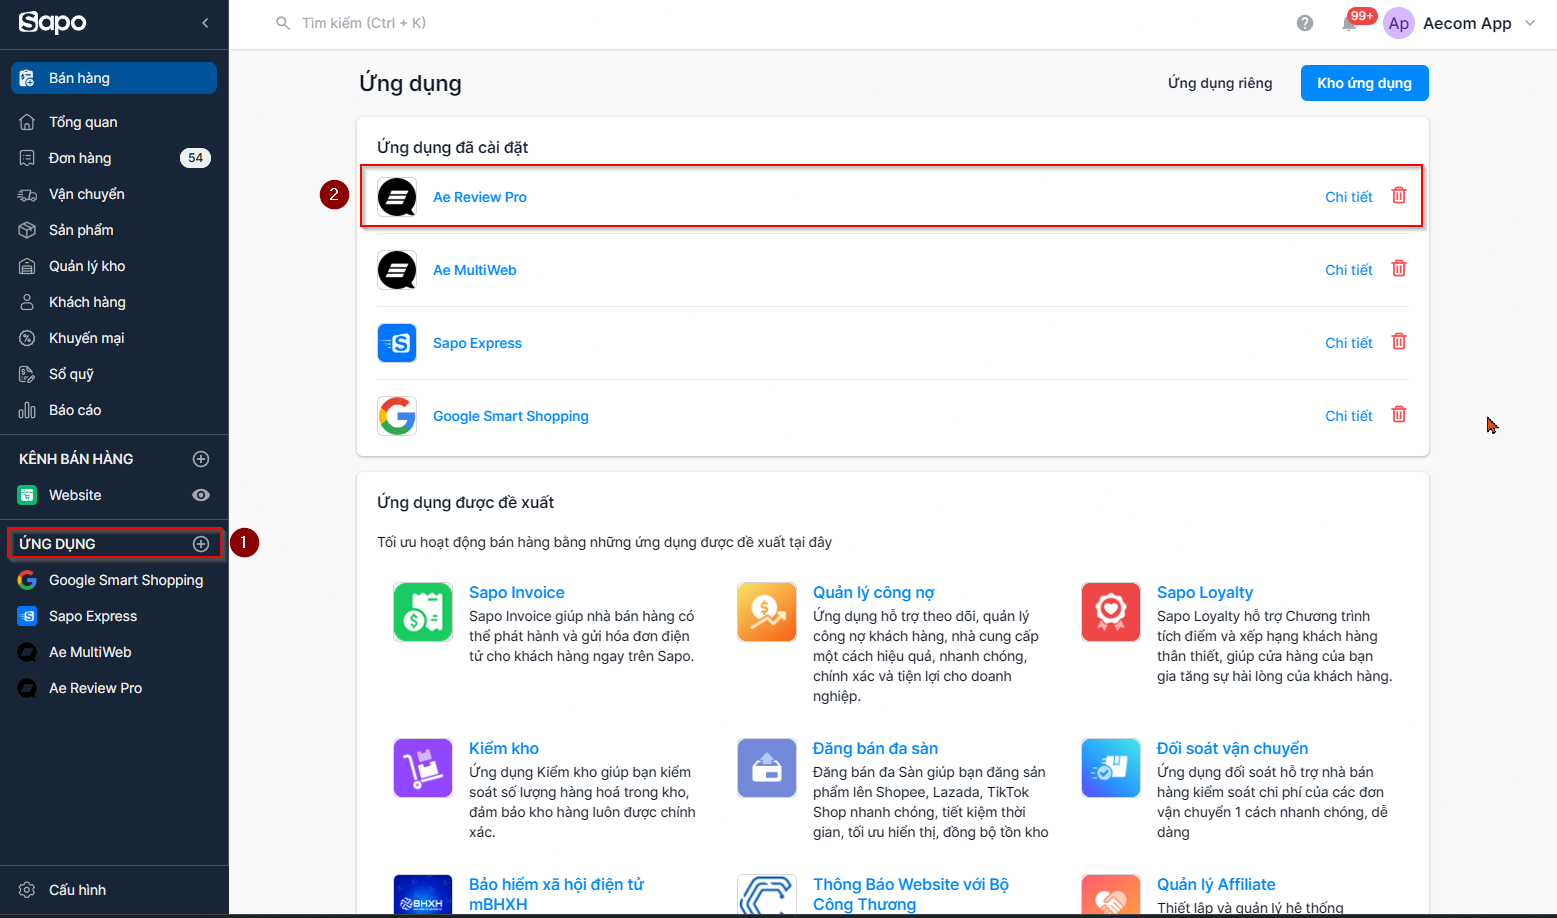
3. Cách truy cập ứng dụng từ trang quản trị Sapo
Ứng dụng được cài đặt thành công sẽ xuất hiện trong trang quản lý ứng dụng
4. Cài đặt cho website bán hàng trên Sapo
Thực hiện theo các bước sau:
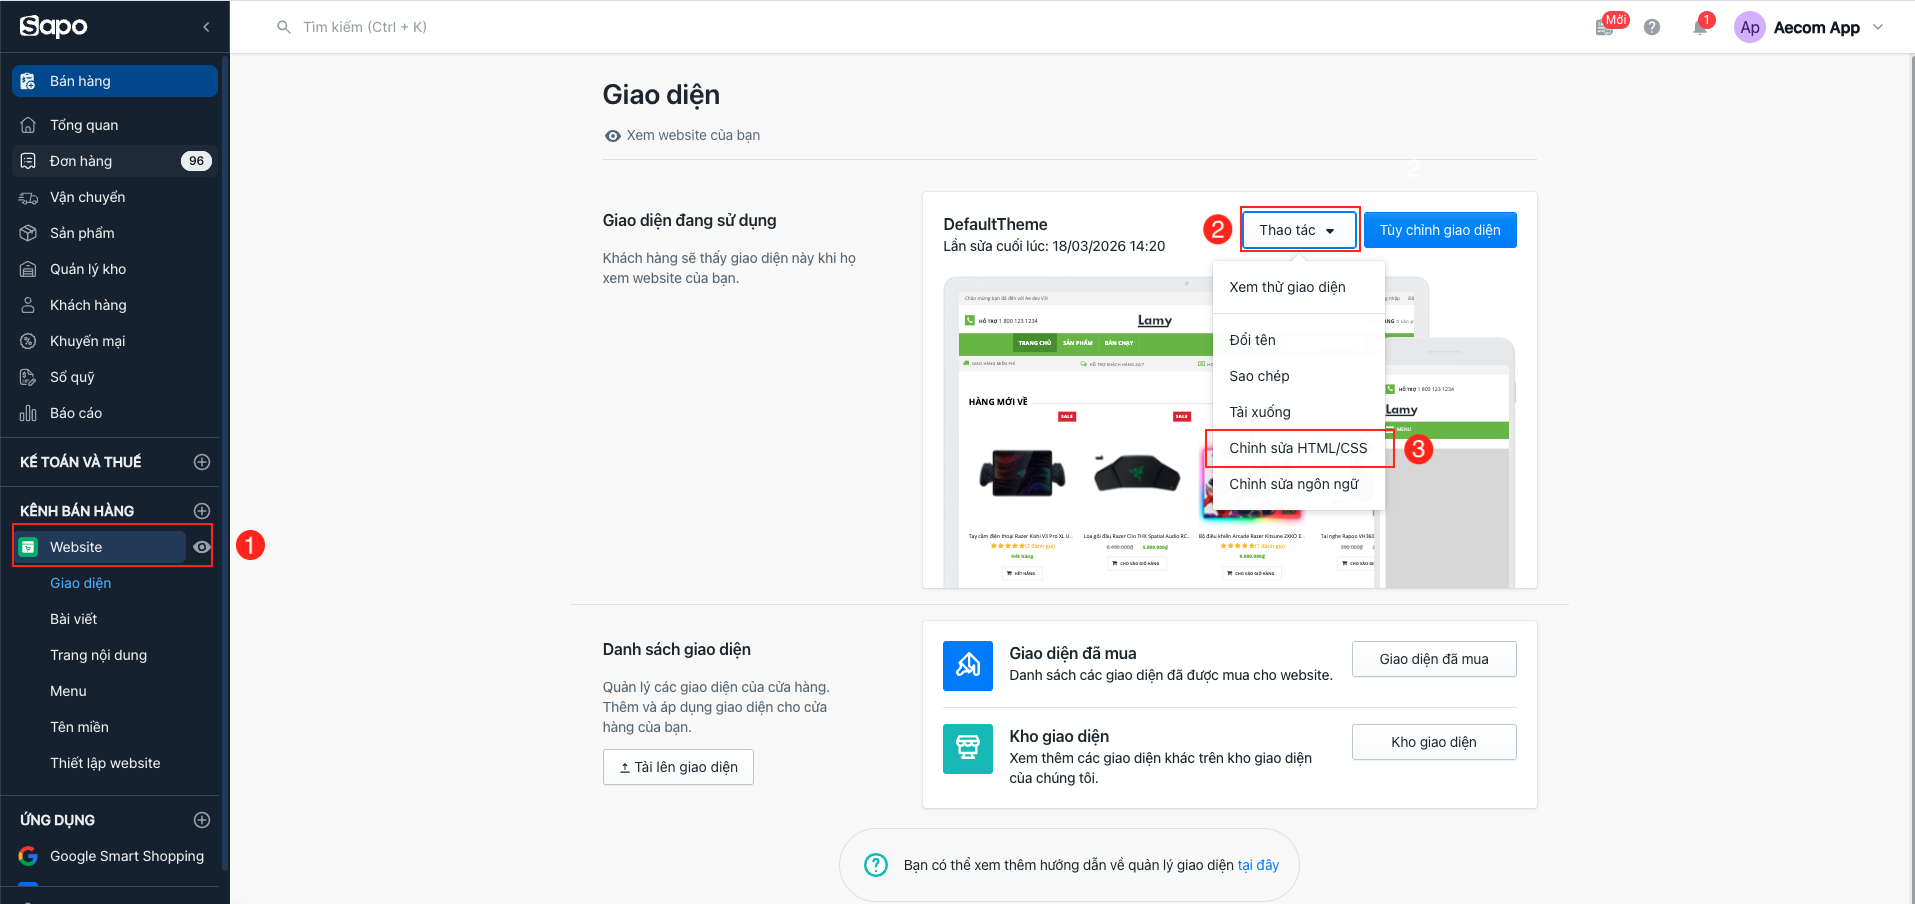
- Bước 1: Truy cập vào website bán hàng của bạn rồi đi đến Chỉnh sửa HTML/CSS
-
Bước 2: Tạo mới các đoạn mã code (khi tạo mới file chỉ cần nhập tên, không cần nhập đuôi .bwt, .js, .css):
- Truy cập vào Snippets → Thêm mới snippet để tạo file .bwt → Nhập tên aer-template → Thêm mới.
Sau khi tạo xong, copy toàn bộ nội dung trong file aer-template.zip và dán vào aer-template.bwt rồi lưu.
Thực hiện tương tự với file aer-render-rate.bwt bằng nội dung trong aer-render-rate.zip.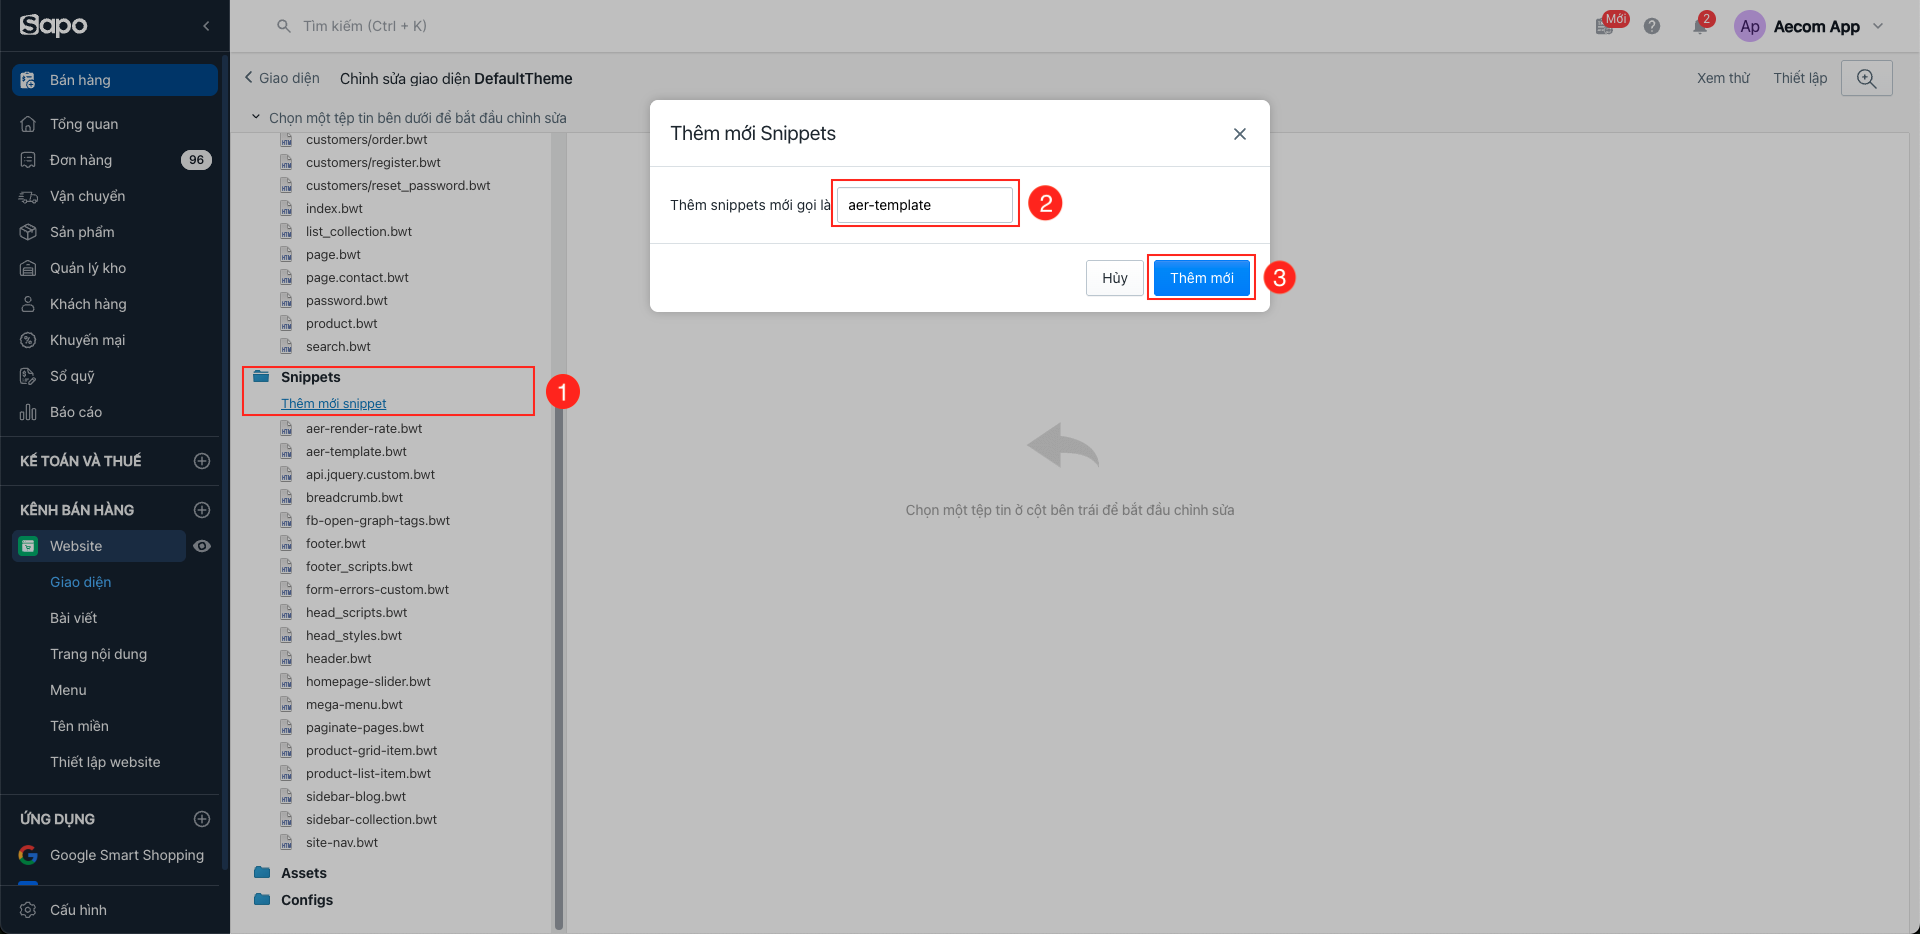
- Truy cập vào Assets → Thêm mới asset để tạo các file .js, .css → Chọn Tạo tệp tin trống → Nhập tên và chọn đuôi file phù hợp.
Sau đó, copy nội dung tương ứng từ các file sau và dán vào từng file: aer-template.js, aer-template.css, aer-template-config.css.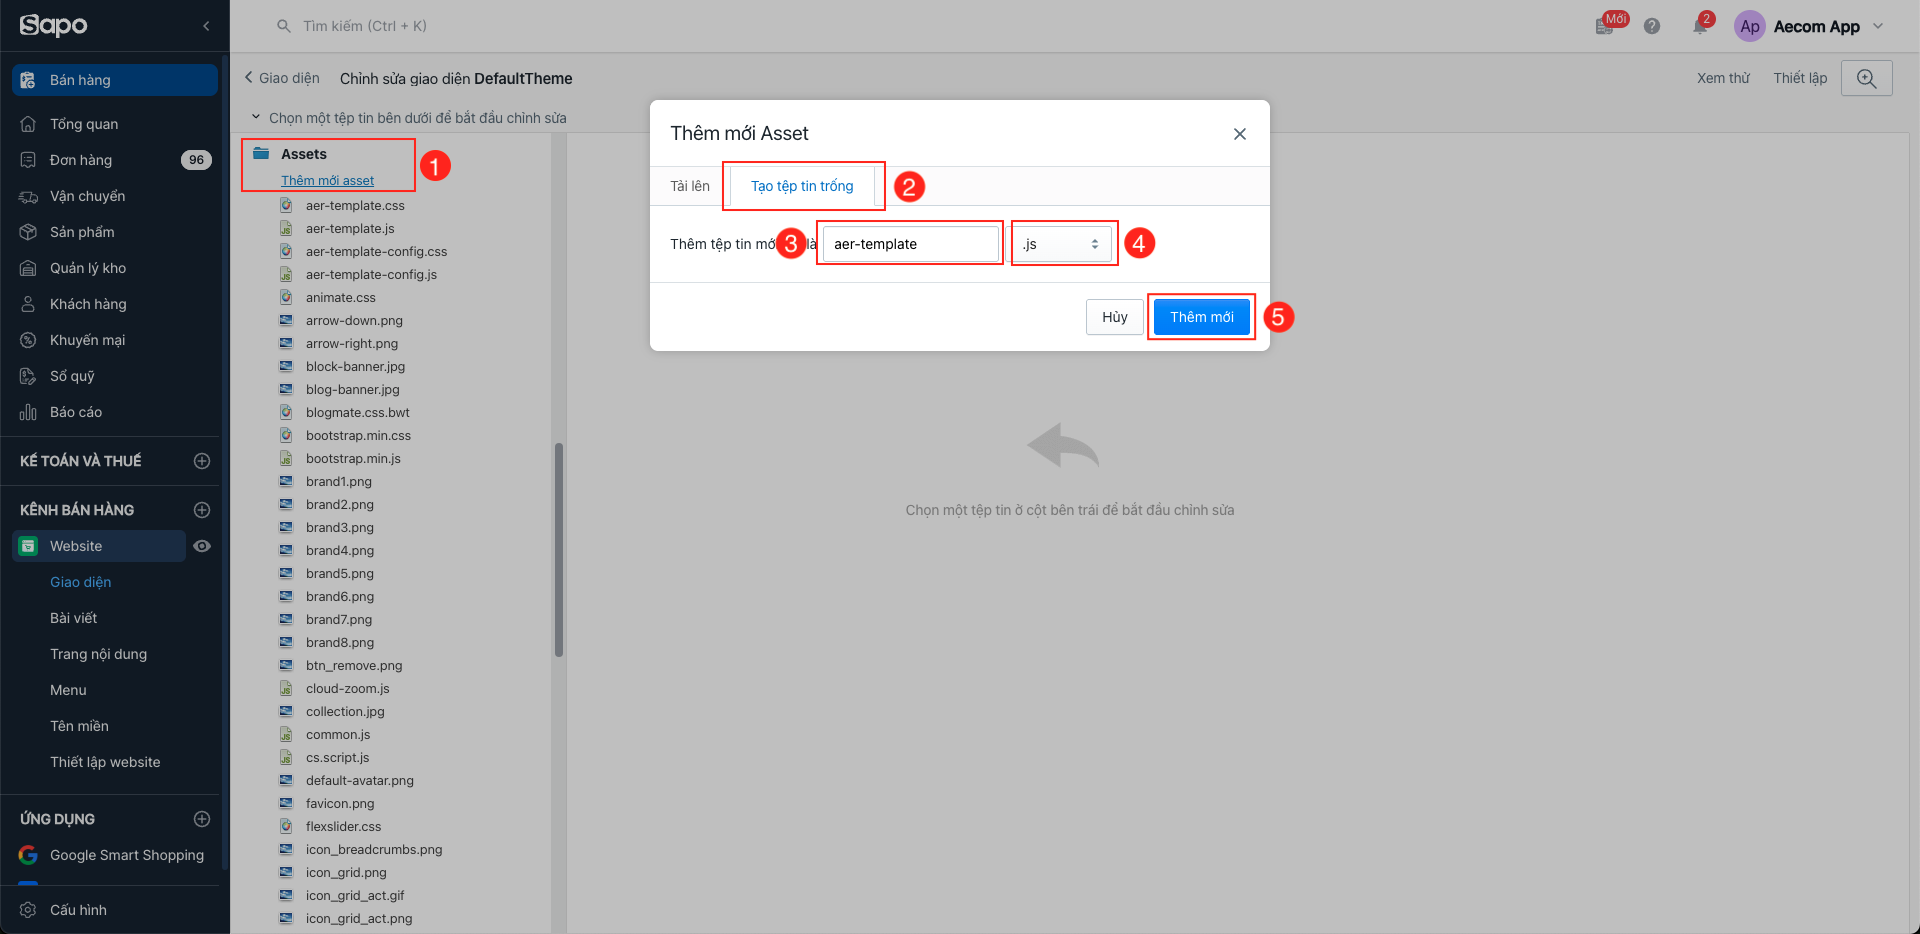
- Truy cập vào Snippets → Thêm mới snippet để tạo file .bwt → Nhập tên aer-template → Thêm mới.
-
Bước 3: Thêm các đoạn mã code sau để hiển thị thông tin cho sản phầm
-
Vào Templates->product.bwt để hiển thị form đánh giá, bình luận và lượng rate.
Thêm đoạn mã css này vào đầu trangMã code<style>
.aer-product-reviews-star{
justify-content: left !important;
margin-top:6px;
margin-bottom:6px;
}
.aer-product-reviews-star .star-svg svg{
width:26px;
height:26px;
}
.aer-product-reviews-star.no-rating .total-comment{
margin-left: 6px;
font-size:14px;
color:rgba(255, 190, 0, 1);
cursor:pointer;
text-decoration:underline;
}
#desc-short{
max-height: 300px;
overflow: hidden;
}
.std {
display: flex;
flex-direction: column;
align-items: center;
}
#btn-desc{
width:100%;
display:flex;
align-items:center;
text-align: center !important;
justify-content:center !important;
gap:4px;
padding:10px 16px;
margin-top:12px;
border:1px solid #e5e7eb;
border-radius:4px;
background: #E5E7EB;
color:#212529;
font-weight:500;
cursor:pointer;
line-height: 1;
transition:all .5s ease;
}
#btn-desc:hover{
background:#F3F4F6;
}
#desc-short{
position:relative;
}
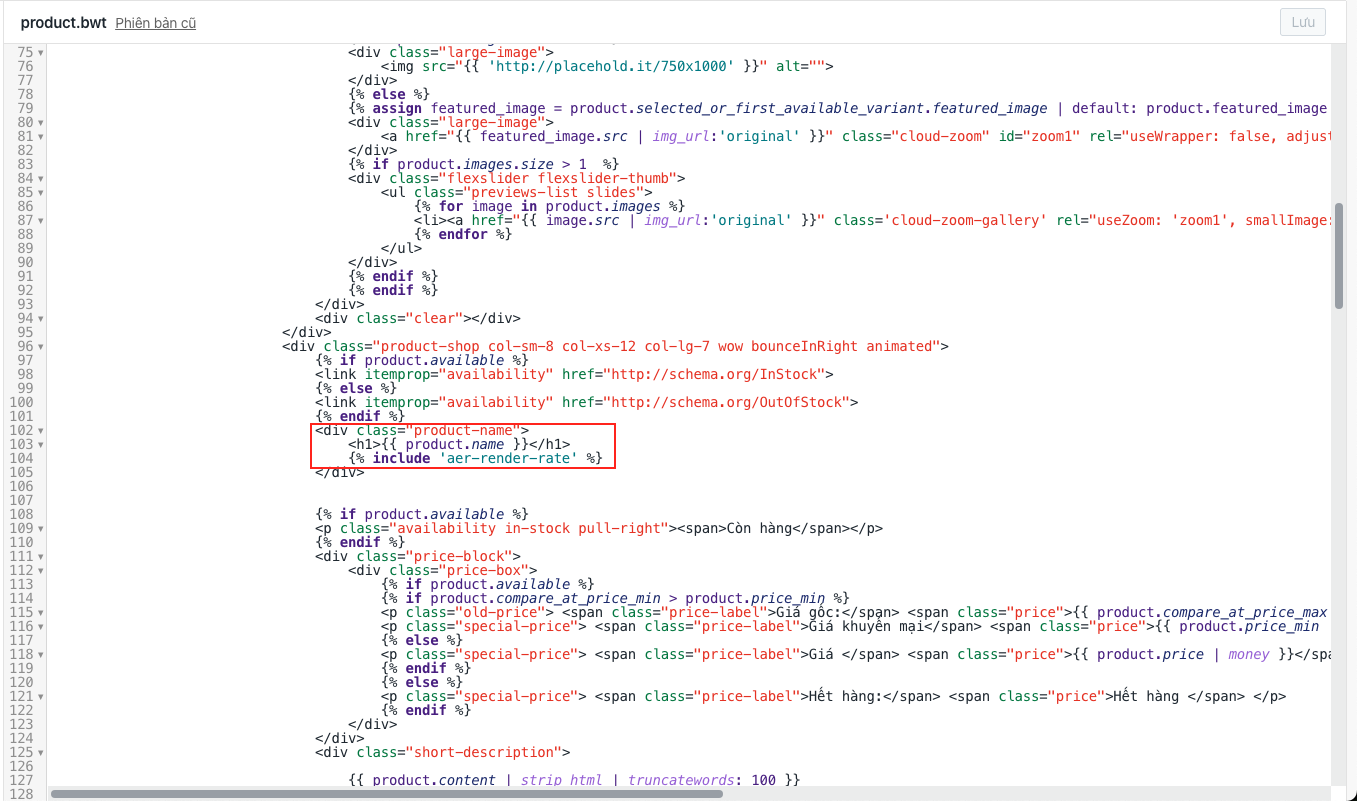
</style>Để hiển thị số sao và lượt đánh giá cho sản phẩm đó, thêm đoạn mã này
Mã code{% include 'aer-render-rate' %}Ví dụ thêm vào bên dưới tên sản phẩm như hình
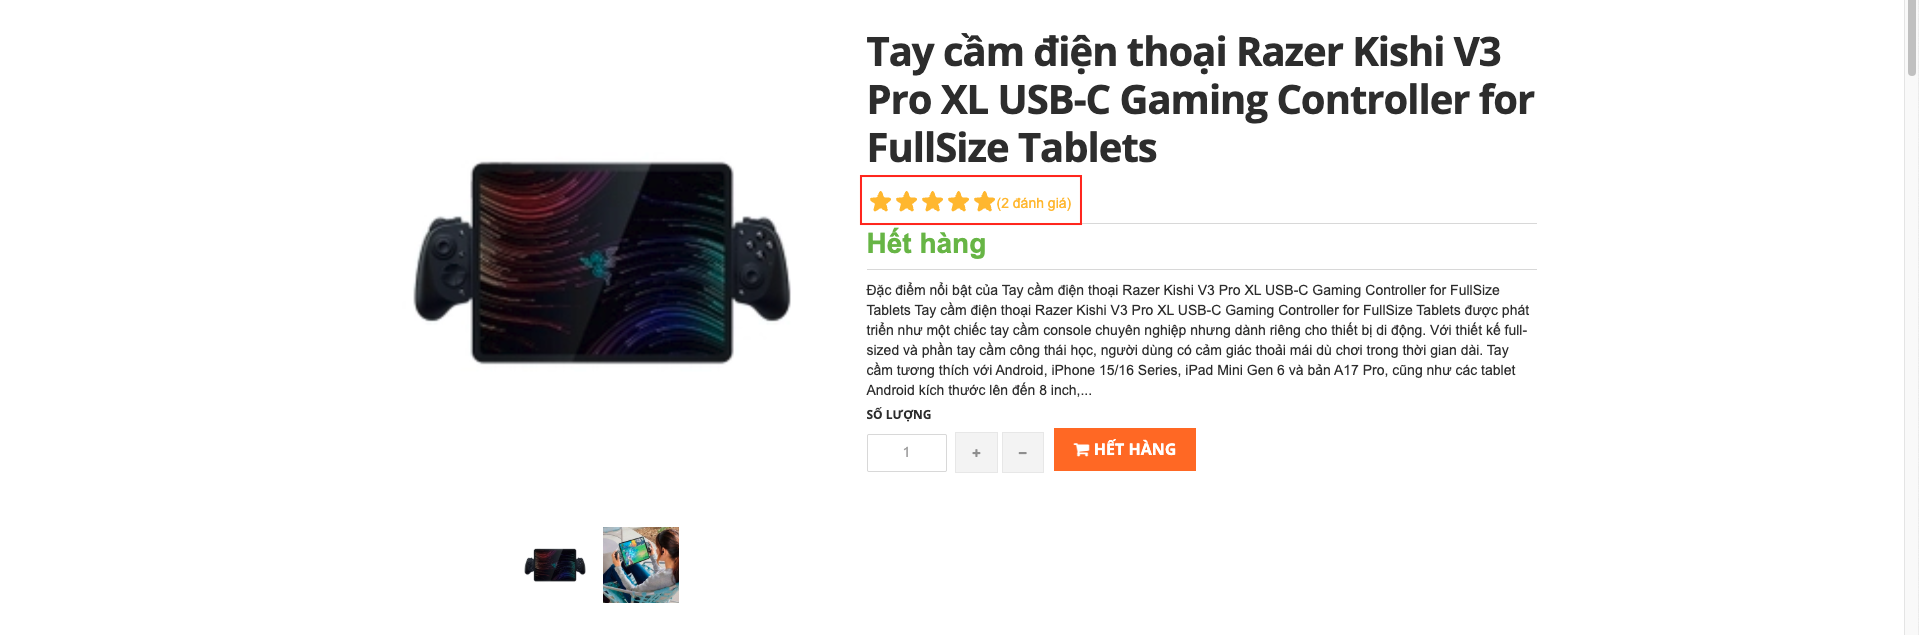
Chức năng xem thêm, thu gọn thông tin sản phầm: Tìm đến đoạn mã
<div id="productTabContent" class="tab-content">rồi thay thế bằngMã code<div id="productTabContent" class="tab-content">
<div class="tab-pane fade in active" id="product_tabs_description">
<div class="std">
<div id="desc-short">
{{ product.content }}
</div>
<div id="desc-full" class="hidden">
{{ product.content }}
</div>
<button id="btn-desc">
</button>
</div>
</div>
{% if settings.display_custom_tab_product %}
<div class="tab-pane fade" id="product_tabs_custom">
<div class="product-tabs-content-inner clearfix">
<p>{{ settings.custom_tab_product_content }}</p>
</div>
</div>
{% endif %}
</div>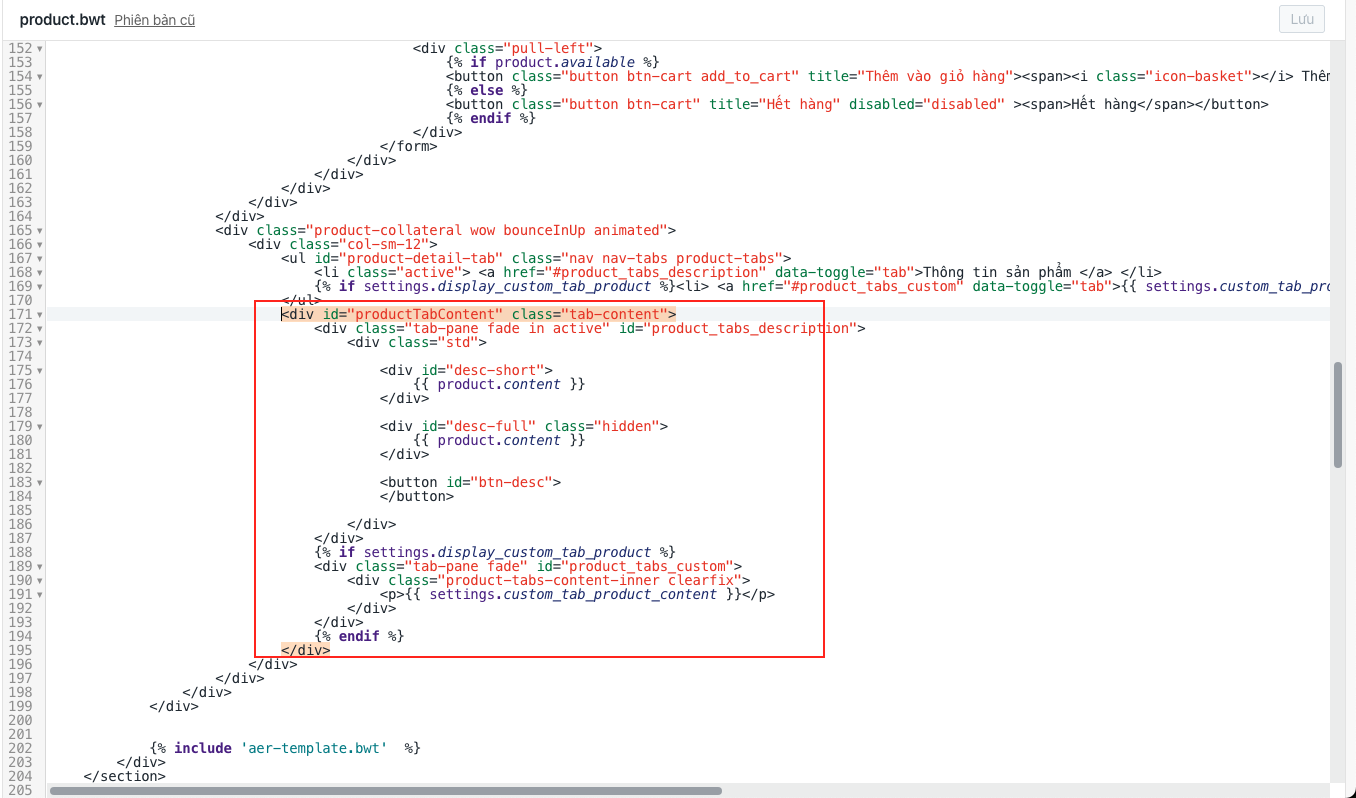
Thêm đoạn mã sau vào trong
<script> </script>Mã codeconst btn = document.getElementById("btn-desc")
const short = document.getElementById("desc-short")
const full = document.getElementById("desc-full")
if (short.scrollHeight <= short.clientHeight) {
btn.style.display = "none"
}
const icon = {
plus: `<svg xmlns="http://www.w3.org/2000/svg" width="20" height="20" viewBox="0 0 24 24" fill="none" stroke="currentColor" stroke-width="2"><circle cx="12" cy="12" r="10"/><path d="M8 12h8"/><path d="M12 8v8"/></svg>`,
minus: `<svg xmlns="http://www.w3.org/2000/svg" width="20" height="20" viewBox="0 0 24 24" fill="none" stroke="currentColor" stroke-width="2"><circle cx="12" cy="12" r="10"/><path d="M8 12h8"/></svg>`
}
const setBtn = (expanded) => {
btn.innerHTML = expanded
? `${icon.minus} Thu gọn`
: `${icon.plus} Xem thêm`
}
setBtn(false)
btn?.addEventListener("click", () => {
const expanded = !full.classList.contains("hidden")
if (expanded) {
full.classList.add("hidden")
short.classList.remove("hidden")
window.scrollTo({
top: short.getBoundingClientRect().top + window.scrollY - 80,
behavior: "smooth"
})
setBtn(false)
} else {
full.classList.remove("hidden")
short.classList.add("hidden")
setBtn(true)
}
})Giao diện sẽ hiển thị
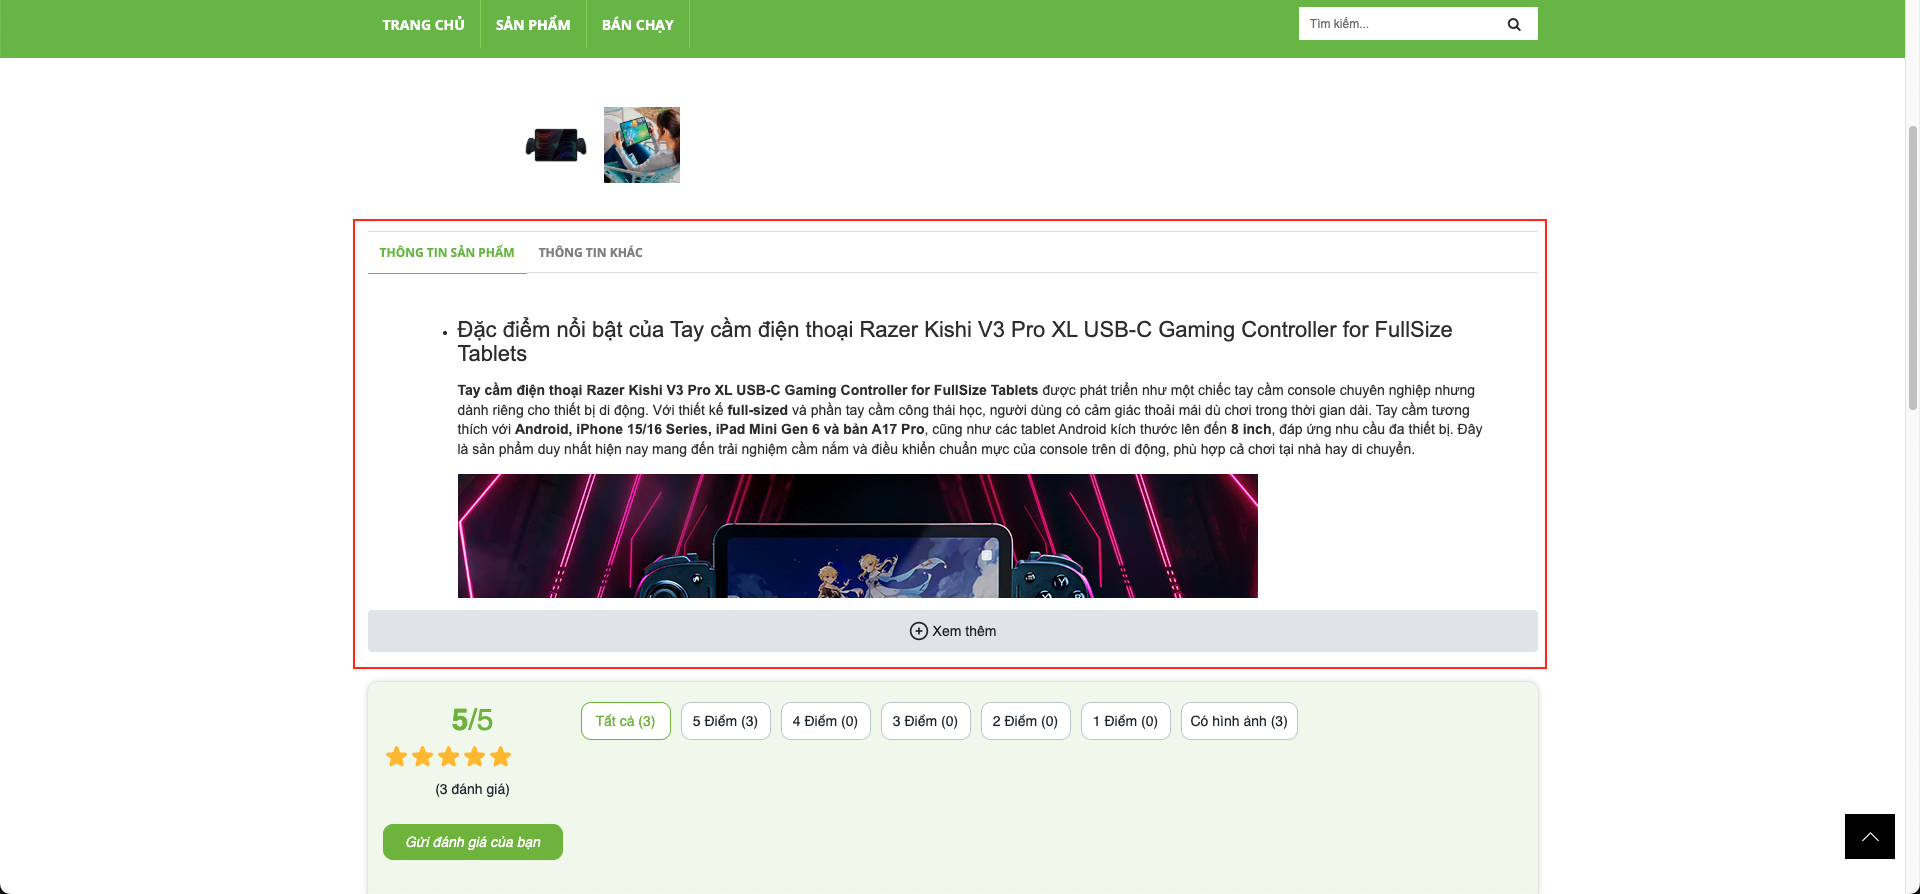
Để có thể gửi và xem đánh giá thêm
{% include 'aer-template.bwt' %}như trong hình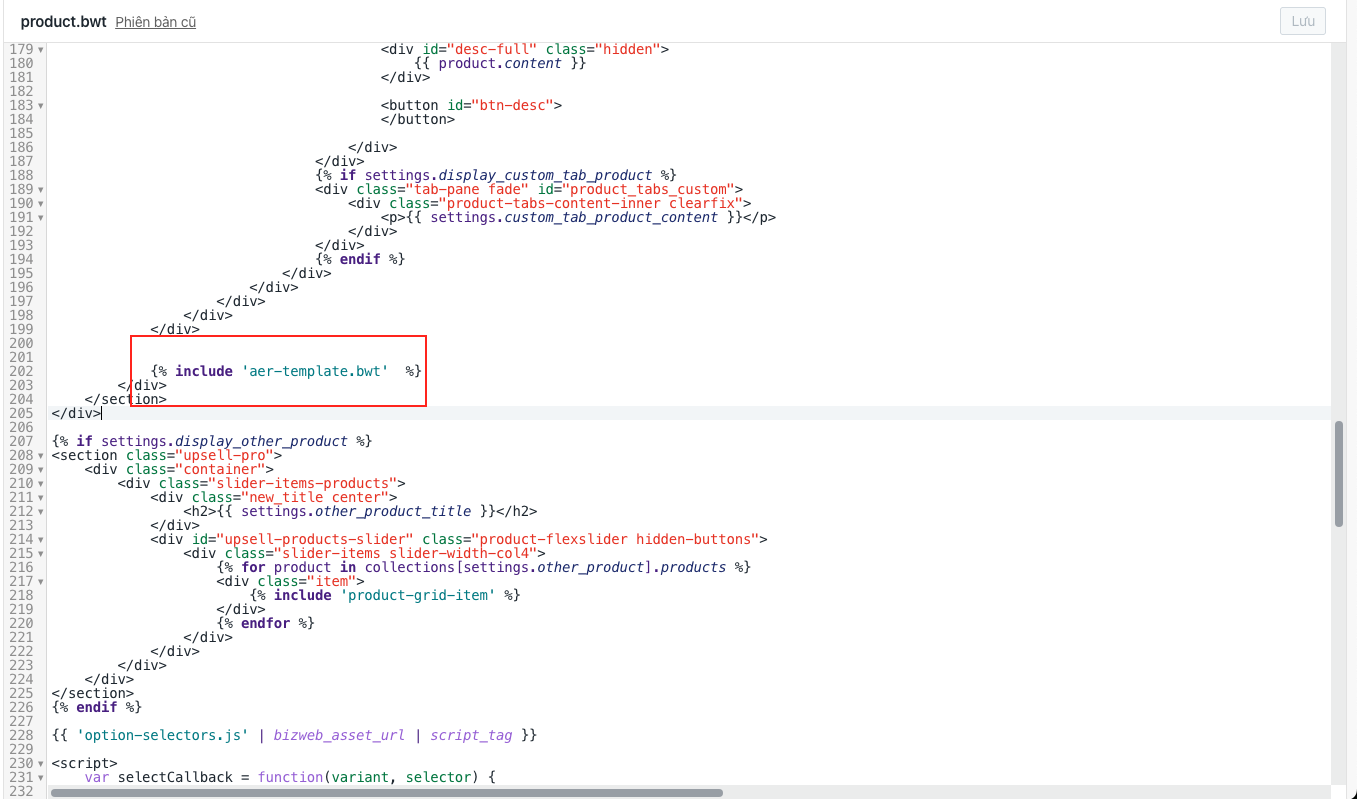
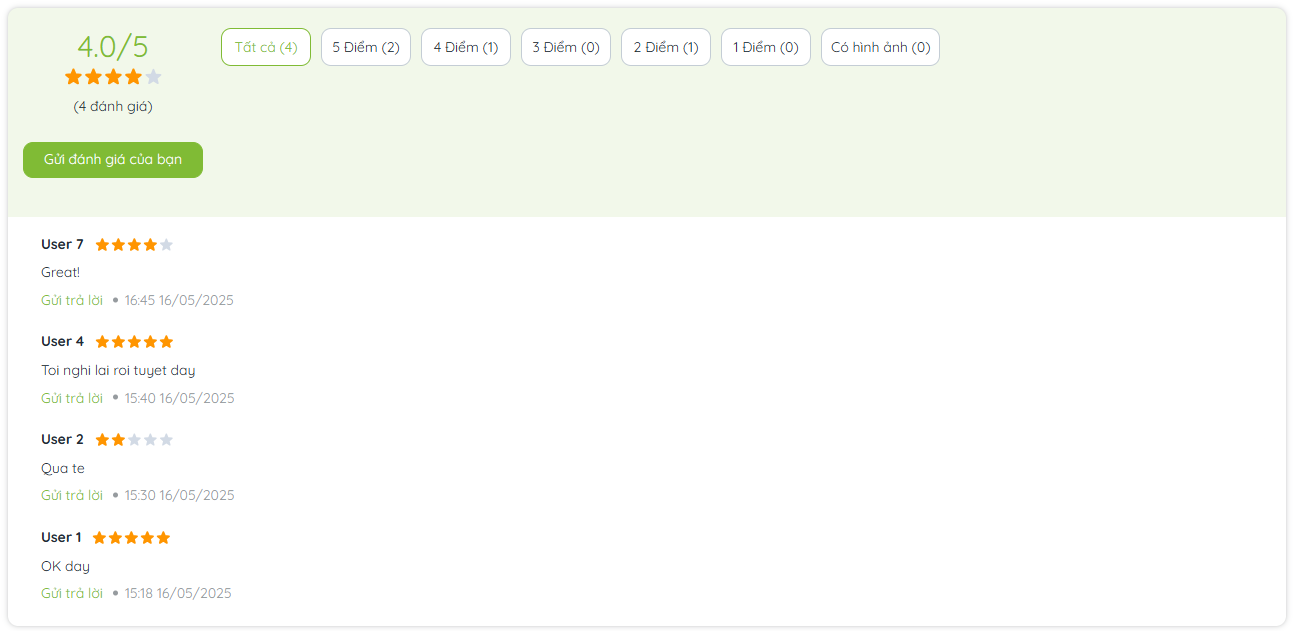
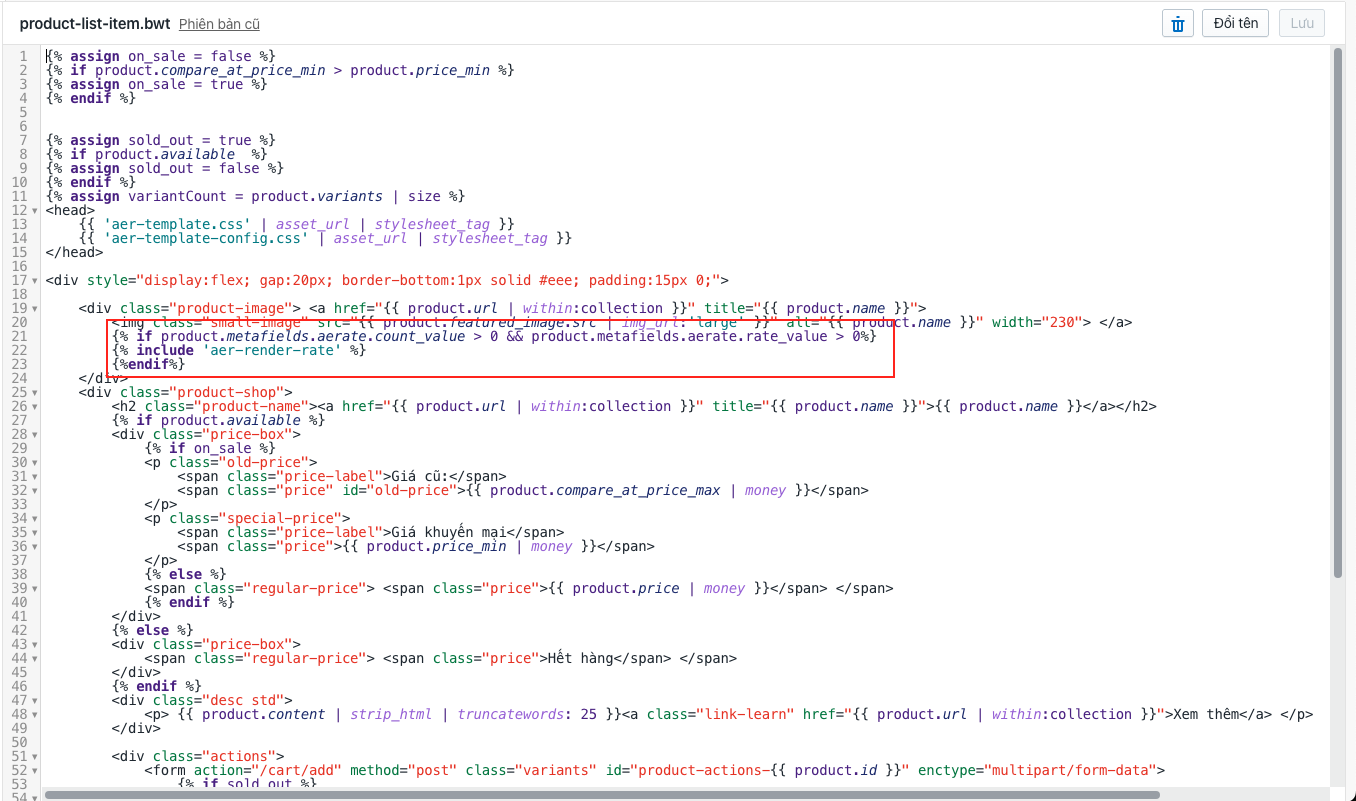
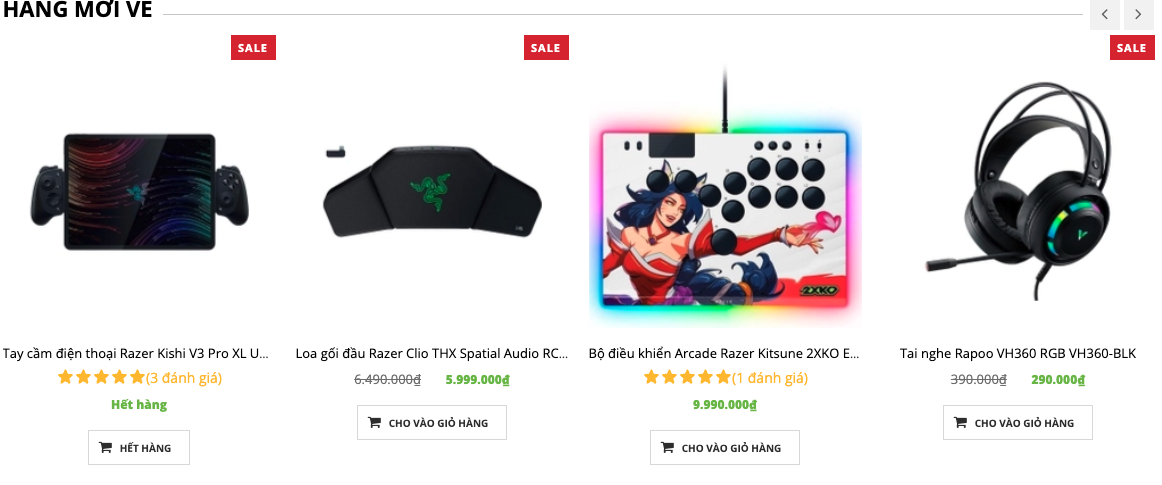
Để sản phẩm ở trang Home cũng có thể hiển thị đánh giá thì dán đoạn mã sau vào product-grid-item.bwt và product-list-item.bwt như trong hình
Mã code{% if product.metafields.aerate.count_value > 0 &&
product.metafields.aerate.rate_value > 0%} {% include 'aer-render-rate' %}
{%endif%}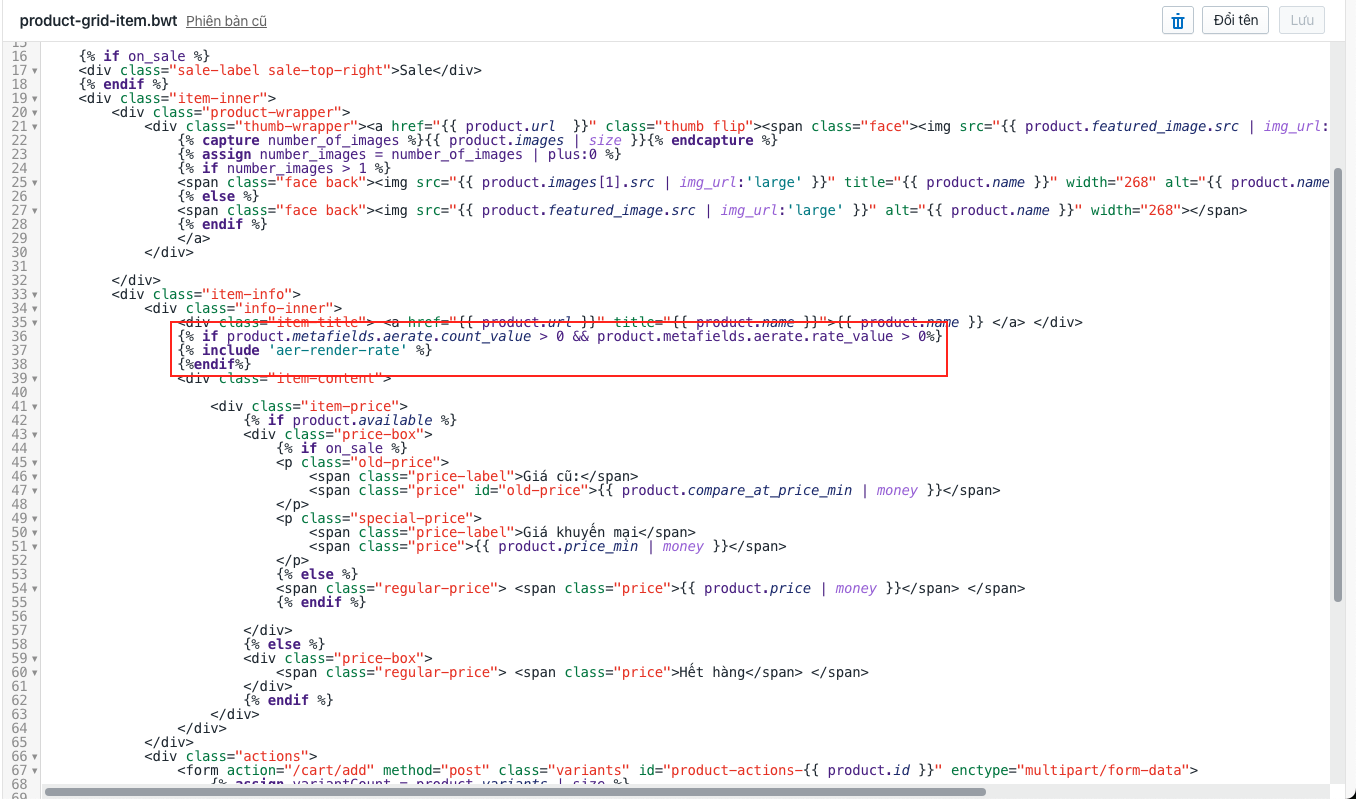
-
Sau khi thực hiện theo hướng dẫn trên, các bạn đã cài đặt thành công ứng dụng Ae Review Pro, nếu có thắc mắc trong quá trình thực hiện vui lòng liên hệ support@aecomtech.vn nhé.